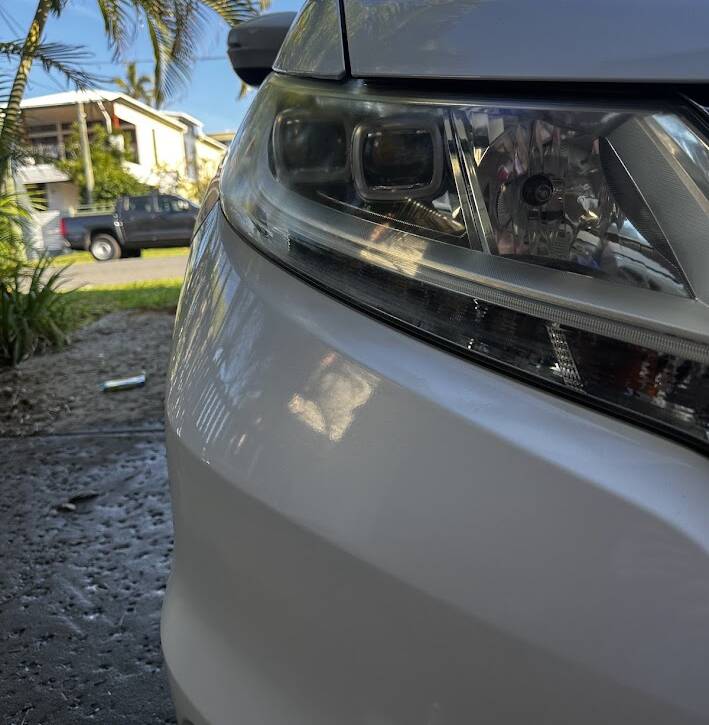
If you’ve noticed your headlights looking dull, hazy, or yellowed, you’re not alone. Over time, UV rays, oxidation, and road grime can build up on your lenses—reducing visibility at night and making even a clean car look tired. Wondering how to clean your headlights effectively? Here’s how the pros do it, and why most off-the-shelf headlight restoration kits don’t always get the job done.
Why Headlight Clarity Matters
It’s not just about looks—cloudy headlights can significantly reduce the amount of light that reaches the road, making night driving less safe. Restoring your headlights is a simple but impactful way to improve both your car’s appearance and your road vision.

Why Most Headlight Restoration Kits Fall Short
Walk into any auto parts store and you’ll find dozens of headlight restoration kits. While some can offer short-term improvement, many don’t fully remove oxidation or haze. That’s because:
- They often rely on light abrasives or wipes that only clean the surface.
- They skip proper polishing steps.
- They don’t include protection, meaning the problem returns fast.
That’s why professional detailers skip the gimmicks and use proven tools and methods to get long-lasting results.
Most kits will fail after a few months and your headlights will be back to foggy and dirty again..
How We Restore Headlights: The Professional Method
At Corsa Detailing Co., we restore headlights the same way we would correct paint—carefully, methodically, and with the right tools.
1. Clean the Headlight Thoroughly
We start by washing the headlights to remove any surface dirt or grease. If you try to polish over dirt, you risk scratching the lens permanently.
2. Mask Around the Headlight
Before polishing, we protect the surrounding paintwork with tape to avoid accidental damage from the polisher.
3. Wet Sanding (If Needed)
For severely oxidized headlights, we’ll use fine-grit wet sanding to level the damaged surface. This step smooths out the oxidation and preps the lens for polishing.
4. Polishing with an Orbital Polisher
Next, we use an orbital polisher paired with a plastic-safe polish. This step is where the magic happens—the haze starts to lift, and the clarity returns. The orbital motion ensures a safe, even finish without overheating the plastic.
5. Seal and Protect
Once restored, we apply a UV-protective sealant to the lens. This step is crucial—it locks in the clarity and prevents future yellowing from UV rays and pollution.
Why This Beats DIY Kits Every Time
- Professional results that last longer.
- Deeper restoration, not just surface cleanup.
- Proper UV protection applied.
- Safe and paint-friendly process.
The Bottom Line
If you’ve ever asked yourself, “how to clean my headlights?”—now you know the answer isn’t a quick wipe with a kit from the shelf. It’s a precision job that requires the right tools, like a high-quality orbital polisher, and proper protection to get your lenses looking like new again.
Want your headlights shining like they used to?
Book our Headlight Restoration service and drive safer, cleaner, and clearer—day or night.